To install wood fence panels on uneven ground, dig deeper holes at the low points and use gravel to fill in the gaps between the ground and panels. This will ensure a level, sturdy installation.
Installing wood fence panels on uneven ground can be challenging but with the right technique, it can be accomplished effectively. Uneven terrain can pose issues when it comes to proper fence installation, but by following the correct steps, you can ensure a stable and attractive fence that complements your property.
In this guide, we will walk you through the process of installing wood fence panels on uneven ground, providing you with the necessary know-how to tackle the task effectively and efficiently. By the end of this article, you will have a clear understanding of the steps involved in achieving a professional-looking wood fence installation on uneven ground.
1. Choosing The Right Materials
Looking for tips on how to install wood fence panels on uneven ground? Choosing the right materials is essential for a successful installation.
Before you start installing wood fence panels on uneven ground, it's essential to choose the right materials. This will ensure that your fence lasts for years to come and provides the desired aesthetic appeal to your property. Here are two key materials you need to consider:
1.1 Pressure-treated Wood
When it comes to durability and resistance against rot and decay, pressure-treated wood is the ideal choice for fence panels. This type of wood is infused with chemicals under high pressure, making it more resistant to moisture and insect damage.
By using pressure-treated wood, you'll have peace of mind knowing that your fence can withstand various weather conditions. Additionally, pressure-treated wood is readily available in most home improvement stores and comes in different styles to suit your preferences.
Whether you prefer a traditional picket fence or a modern privacy fence, you can find pressure-treated wood panels that fit your needs.
1.2 Fence Panels
Next, you need to carefully select the fence panels for your uneven ground. Fence panels are pre-assembled sections designed to make the installation process easier and faster. While many fence panels are designed for level surfaces, special consideration should be given to the topography of your yard. Here's what you need to keep in mind:
Choose fence panels that are flexible and allow for adjustments. Look for panels with individual pickets or slats that can be maneuvered to accommodate the uneven terrain.
Ensure the fence panels are sturdy and well-constructed. Opt for panels made from high-quality materials, such as cedar or redwood, which provide both durability and aesthetic appeal. These natural woods also offer resistance against rot, decay, and insect damage.
Consider the height and width of the fence panels. Measure the area where you plan to install the fence and choose panels that provide the desired privacy and security. Remember to check local regulations and homeowners association guidelines to ensure your fence adheres to any height restrictions.
By selecting pressure-treated wood and fitting fence panels appropriate for uneven ground, you lay a solid foundation for a sturdy and visually appealing fence that complements your property's landscape. Now that you have the right materials, it's time to move on to the next step of installing wood fence panels.
2. Determining The Layout
When installing wood fence panels on uneven ground, determining the layout is a crucial first step. By properly surveying the ground and marking the fence line, you can ensure a precise and visually appealing installation. Let's dive into the details of how to determine the layout for installing wood fence panels on uneven ground.
2.1 Surveying The Ground
Before beginning the installation process, survey the ground where the fence will be installed. Use a measuring tape to assess the varying elevations and identify any potential obstacles such as rocks or tree roots. By understanding the contours of the land, you can plan accordingly to accommodate the uneven terrain.
2.2 Marking The Fence Line
Once you have surveyed the ground, it's time to mark the fence line. Use wooden stakes and string to outline the path where the fence will be installed.
Ensure the string follows the contours of the land, maintaining a consistent height above the ground to accommodate the uneven nature of the terrain. By accurately marking the fence line, you can create a guide for the installation process.
3. Preparing The Ground
Preparing the ground for installing wood fence panels on uneven ground is essential for a sturdy and level structure. Begin by clearing the area of debris and then use a string line to define the fence line, ensuring it follows the contours of the ground. Next, measure and mark post positions and dig holes, making adjustments for uneven terrain.
3.1 Clearing Vegetation
Before starting the installation process, it’s essential to clear any vegetation from the area where the wood fence panel will be placed. This includes removing weeds, rocks, sticks, and any other obstacles that may hinder the process.
3.2 Leveling The Area
Leveling the ground is crucial when installing wood fence panels on uneven terrain. Use a level or a string to ensure the area is smooth and even. This step ensures that the fence panels will be straight and secure once installed.
4. Setting The Fence Posts
Once you have measured and marked the location for your wood fence panels, it's time to move on to setting the fence posts. This step is crucial for the stability and longevity of your fence. In this section, we'll guide you through the process of measuring and digging post holes, as well as securing the posts in place.
4.1 Measuring And Digging Post Holes
Start by measuring the distance between each fence post. This measurement will help you determine the precise location of each post hole. Use a measuring tape to ensure accuracy.
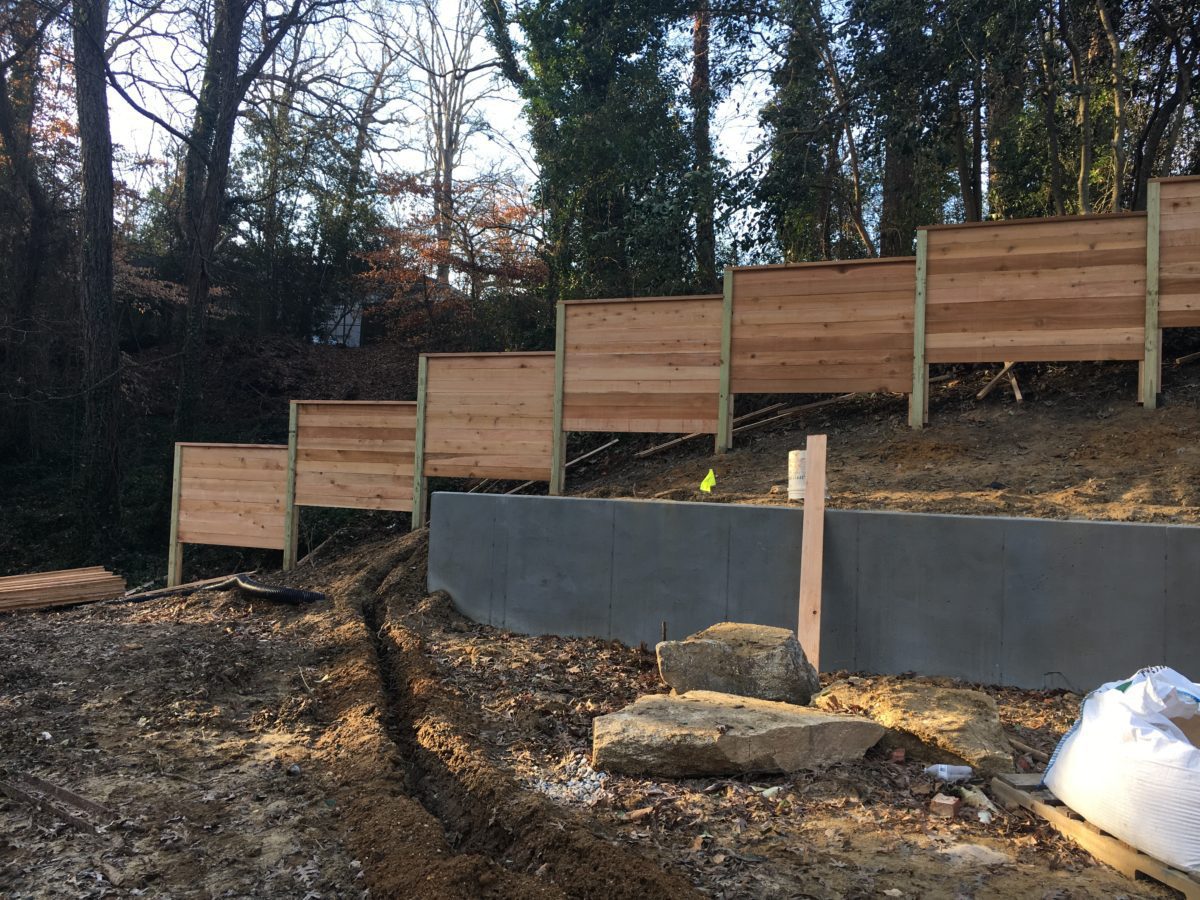
During this process, you may encounter uneven ground. To account for this, dig each post hole individually to accommodate the inconsistencies in height and slope. When digging the holes, make sure they are deep enough to support the height of the fence and to provide a stable foundation.
Once the holes are dug, make sure they are evenly spaced apart – a consistent distance between each hole is essential for an aesthetically pleasing and structurally sound fence. A simple way to achieve this is by using stakes and strings as a guide. Place stakes in the ground at the location of each post, then attach a string between them to create a straight line.
Now, it's time to dig the actual holes. Use a post-hole digger or a shovel to excavate the marked spots. Start by removing the top layer of grass or soil and set it aside. Dig down until you reach the desired depth, ensuring that all post holes have a uniform depth.
4.2 Securing The Posts
With the post holes prepared, it's time to secure the fence posts. Insert each post into its respective hole, ensuring that it is aligned vertically and sits at an even height. To help stabilize the posts, consider using a level or a plumb line to check for accuracy.
Once you are satisfied with the alignment, it's time to fill the holes with concrete. Concrete will provide a solid and secure foundation for your fence posts. Mix the concrete according to the manufacturer's instructions and pour it into each hole, making sure it surrounds the base of the post completely.
Allow the concrete to dry and cure as recommended by the manufacturer. This will typically take a few days. During this time, avoid putting any stress or weight on the posts to ensure they set properly.
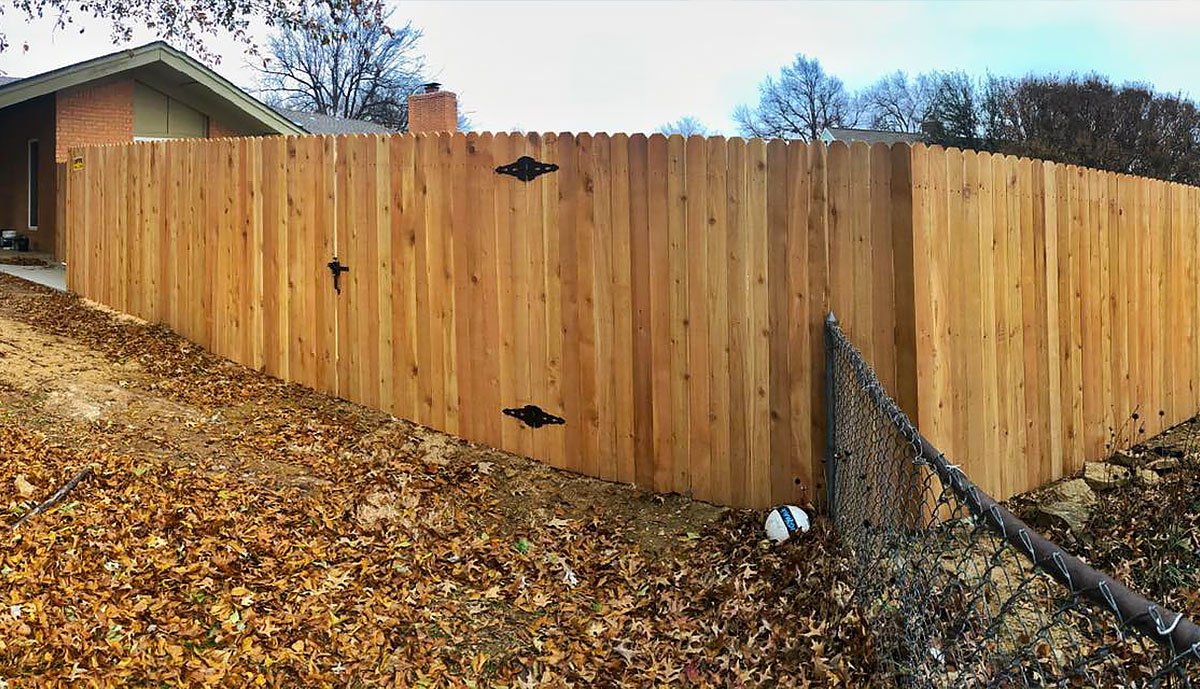
After the concrete has fully dried, you can continue with the installation of your wood fence panels. Attach them securely to the posts, and your beautiful, functional fence on uneven ground is ready to enhance your outdoor space.
5. Installing The Wood Fence Panels
When installing wood fence panels on uneven ground, begin by preparing the area and determining the slope. Then, adjust the fence posts accordingly to ensure a level installation. Next, attach the panels to the posts, making sure they follow the natural contour of the ground for a seamless finish.
Installing wood fence panels on uneven ground can be a bit challenging, but with the right techniques, it can be done effectively. In this section, we will guide you through the process of attaching the panels and adjusting for uneven ground, ensuring a sturdy and visually appealing fence.
5.1 Attaching The Panels
Attaching the wood fence panels correctly is crucial for the overall stability and durability of your fence. Here are the steps to follow:
Start by measuring the length of each fence panel and the distance between the posts. This will help you determine the number of panels needed and the spacing required.
Position the first fence panel against the first set of posts, making sure it is level both horizontally and vertically. Use a level tool to ensure accuracy.
Secure the panel to the posts by using galvanized screws or nails. Make sure to attach the panel firmly to the posts to prevent future movement and potential weakness.
Repeat the process for the remaining panels, ensuring each one is leveled and securely attached to the posts.
5.2 Adjusting For Uneven Ground
Uneven ground can pose a challenge when installing wood fence panels. However, there are ways to overcome this issue and achieve a visually pleasing result. Here's what you can do:
Start by placing your first panel in the desired position, aligning it with the first set of posts.
If the ground is uneven, you may need to adjust the bottom of the panel. This can be done by digging a small trench on one side of the panel or adding gravel to raise it on the other side.
Continue with the remaining panels, ensuring each one is adjusted to compensate for the uneven ground. Remember to check for levelness both horizontally and vertically.
When encountering a significant slope, you may need to cut one side of the panels to maintain an even top line. Use a saw or a panel cutting tool to achieve a clean and precise cut.
Once all the panels are installed, step back and visually inspect the fence for any inconsistencies. Make necessary adjustments to ensure a seamless and professional appearance.
Installing wood fence panels on uneven ground requires careful measurement, leveling, and adjustment. By following these steps, you can overcome the challenges presented by uneven terrain and create a sturdy and visually appealing fence for your outdoor space.
6. Finishing And Maintenance
Installing wood fence panels on uneven ground requires careful attention to detail and proper finishing and maintenance. By following these guidelines, you can ensure a sturdy and visually appealing fence that will withstand the test of time.
Now that you have successfully installed your wood fence panels on uneven ground, it's time to add those finishing touches and ensure regular maintenance to keep your fence looking great. In this section, we will discuss how to add those finishing touches in 6.1 Adding Finishing Touches and the importance of regular maintenance in 6.2 Regular Maintenance.
6.1 Adding Finishing Touches
To complete the installation and make your wood fence panels on uneven ground look professionally done, there are some finishing touches you can add. These small details can make a big difference in the overall appearance and durability of your fence. Here are a few suggestions:
Apply a protective finish: By applying a protective finish to your wood fence panels, you can protect them from moisture, sunlight, and other outdoor elements. This will help prevent the warping, splitting, and rotting of the wood.
Seal the gaps: If there are any gaps between the fence panels or between the panels and the ground, sealing them will not only improve the visual appeal but also prevent unwanted pests from entering your property.
Add post caps: Post caps not only add a decorative touch to your fence but also protect the fence posts from water damage. They come in various designs and materials, allowing you to choose the one that complements your fence style.
Trim the edges: If there are any uneven edges or protruding nails, trim them carefully to ensure a smooth and polished look. This step will not only enhance the aesthetics of your fence but also prevent any potential injuries.
Remember, these finishing touches may vary based on your specific fence design and personal preferences. Take your time to evaluate what will work best for your fence and make the necessary adjustments accordingly.
6.2 Regular Maintenance
Regular maintenance is crucial to keep your wood fence panels on uneven ground in top-notch condition. Performing routine maintenance tasks will not only extend the lifespan of your fence but also save you from costly repairs down the line. Here are some important maintenance practices to follow:
Inspect for damages: Regularly inspect your fence for any signs of damage such as loose boards, broken pickets, or loose fasteners. Addressing these issues promptly will prevent further damage and help maintain the structural integrity of your fence.
Clean the fence: Remove any dirt, debris, or mildew that may have accumulated on your fence panels. You can simply use a hose and a soft brush to clean them. Avoid using harsh chemicals or power washing, as they can damage the wood.
Reapply protective finish: Over time, the protective finish applied to your wood fence panels may wear off. Check the condition of the finish and reapply it when necessary. This will ensure that your fence continues to resist moisture and sunlight.
Trim vegetation: Keep plants, bushes, and trees near your fence trimmed. Overgrown vegetation can cause moisture buildup, which can lead to wood decay and damage. Trimming them will prevent such problems and maintain good airflow around your fence.
By implementing these regular maintenance practices, you can enjoy a beautiful and durable wood fence for years to come. Now that you understand how to add those finishing touches and the importance of regular maintenance, you are well-equipped to maintain your wood fence panels on uneven ground.
Following these steps will not only enhance the appearance of your fence but also prolong its lifespan. Remember, a well-maintained fence is not only an asset to your property but also a reflection of your attention to detail and commitment to maintaining your outdoor space.
Frequently Asked Questions On How To Install Wood Fence Panels On Uneven Ground
How Do You Install Wood Fence Panels On Uneven Ground?
Installing wood fence panels on uneven ground requires careful planning and the use of leveling techniques such as digging and adjusting post height.
What Tools Do I Need For Installing Wood Fence Panels?
To install wood fence panels, you will need tools such as a measuring tape, level, post-hole digger, saw, hammer, nails, and a drill.
How Do I Ensure That My Fence Panels Are Level?
Ensuring that your fence panels are level involves using a level, adjusting post heights, and confirming measurements at multiple points along the fence line.
Can I Install Wood Fence Panels Myself Or Should I Hire A Professional?
While it is possible to install wood fence panels on your own, hiring a professional can ensure proper installation and save you time and potential mistakes.
Conclusion
Installing wood fence panels on uneven ground requires careful planning and execution. By following the steps outlined in this guide, you can ensure a sturdy and visually appealing fence that enhances your property's security and privacy.
Remember to prepare the ground properly, use the right tools, and make adjustments as needed. With patience and attention to detail, you'll be able to successfully install a wood fence that stands the test of time.


0 Comments